- The Digital Architect
- Posts
- The Underrated Technique for Efficient 3D Animations
The Underrated Technique for Efficient 3D Animations
A simple yet effective technique to avoid mishaps, saving valuable time and effort in post-production.

Creating realistic 3D animations can be time-consuming, especially when working under tight deadlines. After hitting the render button, we never truly know how our computer might respond—whether it crashes or suffers a power outage, risking hours or even days of lost work. Fortunately, there’s a simple yet effective technique to avoid these mishaps, saving valuable time and effort in post-production.
In this article, I’ll guide you through a workflow that uses D5 Render, Lightroom, and After Effects to render animations efficiently.
TABLE OF CONTENTS
STEP 1: Using Image Sequences in D5 Render
STEP 2: The Benefits of Image Sequences
STEP 3: Post-Production in Lightroom
STEP 4: Assembling the Animation in After Effects
BONUS TIP: Using Image Sequences in D5 Render
CONCLUSION: Using Image Sequences in D5 Render
Using Image Sequences in D5 Render
Begin by visiting D5 Render's website. Under the Assets tab, select Free 3D Asset Scene Download. These assets are free for testing and exploration. For this tutorial, we’ll be using a city scene.

You can download free 3d scenes to explore from D5 Render’s website.
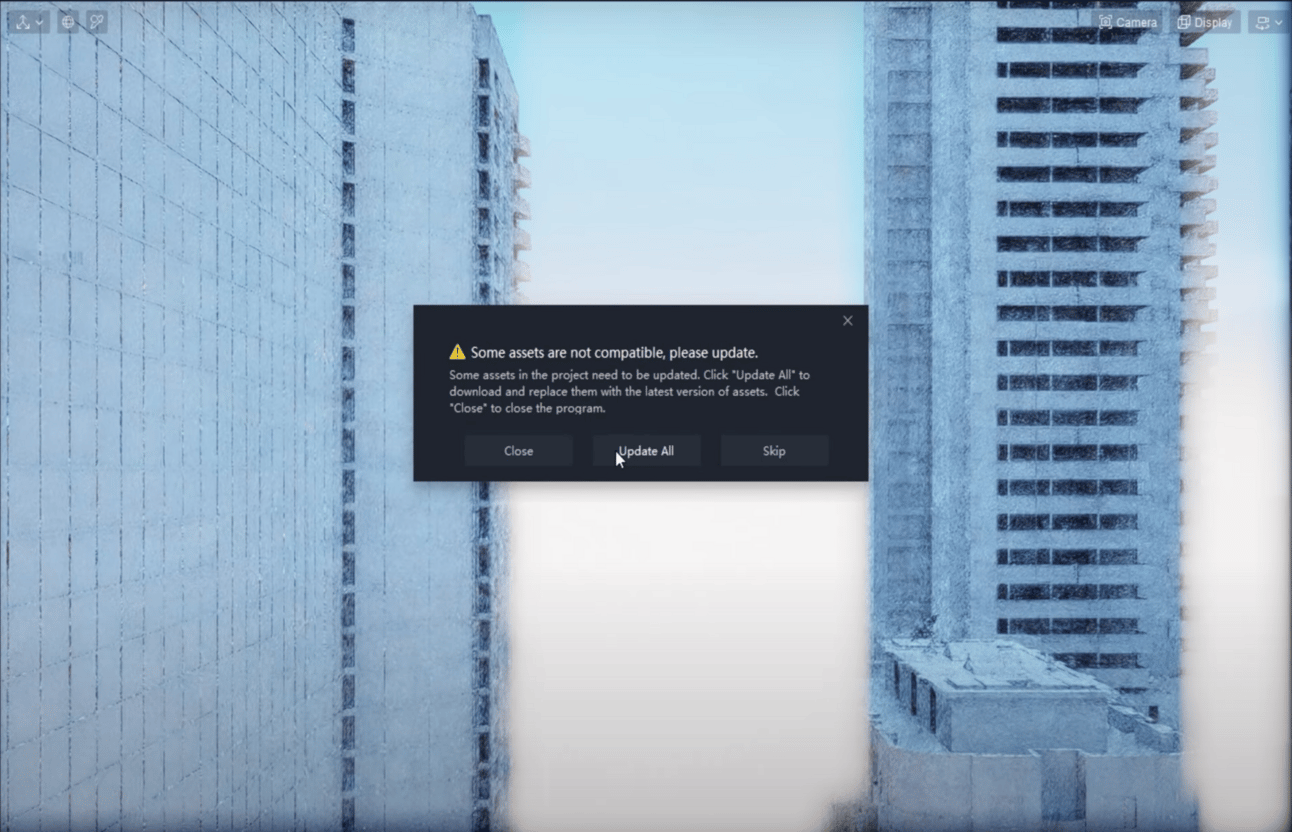
After downloading the scene file, open it in D5 Render. If you encounter a warning about incompatible assets, simply select the Update All option.

You need to Choose the “Update All” option to load all assets in the scene.
To create an animation, click on the second camera icon. Set up an animation sequence by assigning two reference points. When ready, go to the Sequence tab, select PNG format, and set the output resolution to 4K. Turn off unnecessary channels and hit the render button.

You can choose 4K resolution under the Sequence tab and disable the Channels option.
The Benefits of Image Sequences
Rendering your animation as an image sequence allows you to save each frame individually. If an error occurs, you won't lose any data, safeguarding your work and saving time. Once rendering is complete, move on to post-production.

One of the clips created using Image Sequence process.
Post-Production in Lightroom
Open Lightroom and create a new album for your rendered images. Import all the files into this album. The beauty of this process is that you can edit one image and apply the same settings to the rest using batch editing. This speeds up the post-production workflow significantl

Just edit one of the images in Lightroom and then apply all changes to the rest of the images.
After editing, export all the images to a folder.
Assembling the Animation in After Effects
Now, let’s move to After Effects. Start a new project, and import the image sequence by selecting the first image and ensuring the PNG Sequence and Create Composition options are checked. Once imported, you can preview the animation by pressing the spacebar.

Make sure to enable the “PNG Sequence” option.

After importing all the images into After Effects, you have yourself am animation clip.
When you're satisfied, export the file by selecting Media Encoder Que under the File tab. Adjust the settings as needed and hit the green play button to complete the export.
Bonus Tip:
If you want to take your skill to the next level, you can check out this film emulation software that I personally use — Dehancer. It’s a plugin inside video editing software such as Premiere Pro, DaVinci Resolve, and Final Cut Pro that enhances your videos to achieve that cinematic look that you see on films. Just recently, they announced their competition - Dehancer Colorist Awards 2024, which you can check out right here.

Take part on the competition or be inspired from talented color enthusiasts around the world.
Conclusion
By using image sequences in D5 Render, batch editing in Lightroom, and assembling the animation in After Effects, you can save time and avoid potential rendering mishaps. This technique ensures that your hard work is protected and streamlines the post-production process. To have a better understanding on the entire process, you can check out the walkthrough video below:
For more tips on 3D visualizations, be sure to check out my other tutorials. If you want to try out D5 Render for yourself, you can use this link to get a discount on your annual subscription.
If you’re ready to take your composition skills to the next level, grab a copy of my eBook - Mastering Compositions in Architectural Visualization: A Beginner’s Guide. It’s packed with guides and real-world examples to help you create cinematic visuals instantly.